Kubernetes Dashboard
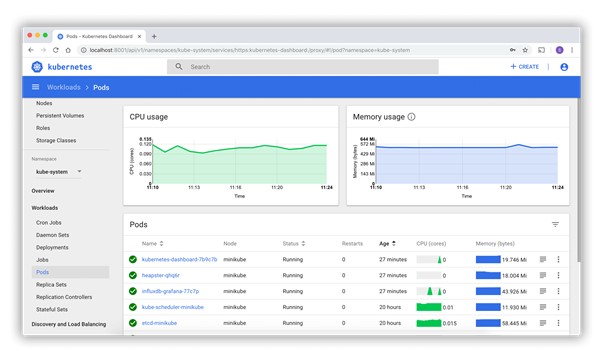
The Kubernetes Dashboard provides a web-based user interface for Kubernetes cluster management. Minikube installs the Dashboard as an addon, but it is disabled by default. Prior to using the Dashboard we are required to enable the Dashboard addon, together with the metrics-server addon, a helper addon designed to collect usage metrics from the Kubernetes cluster. To access the dashboard from Minikube, we can use the minikube dashboard command, which opens a new tab in our web browser displaying the Kubernetes Dashboard, but only after we list, enable required addons, and verify their state.
$ minikube addons list
$ minikube addons enable metrics-server
$ minikube addons enable dashboard
$ minikube addons list
$ minikube dashboard
In case the browser is not opening another tab and does not display the Dashboard as expected, verify the output in your terminal as it may display a URL for the Dashboard (together with some Error messages). If the URL is not displayed, we can request it to be displayed with the following command:
$ minikube dashboard –url
Copy and paste the displayed URL in a new tab of your browser. Depending on your terminal’s features you may be able to just click or right-click the URL to open directly in the browser.
After a logout/login or a reboot of your workstation the expected behavior may be observed (where the minikube dashboard command directly opens a new tab in your browser displaying the Dashboard).
APIs with ‘kubectl proxy’
Issuing the kubectl proxy command, kubectl authenticates with the API server on the control plane node and makes services available on the default proxy port 8001.
First, we issue the kubectl proxy command:
$ kubectl proxy
Starting to serve on 127.0.0.1:8001
It locks the terminal for as long as the proxy is running, unless we run it in the background (with kubectl proxy &).
When kubectl proxy is running, we can send requests to the API over the localhost on the default proxy port 8001 (from another terminal, since the proxy locks the first terminal when running in foreground):
$ curl http://localhost:8001/
{
“paths”: [
“/api”,
“/api/v1”,
“/apis”,
“/apis/apps”,
……
……
“/logs”,
“/metrics”,
“/openapi/v2”,
“/version”
]
}
With the above curl request, we requested all the API endpoints from the API server. Clicking on the link above (in the curl command), it will open the same listing output in a browser tab.
We can explore several path combinations with curl or in a browser as well, such as:
http://localhost:8001/api/v1
http://localhost:8001/apis/apps/v1
http://localhost:8001/healthz
http://localhost:8001/metrics
APIs with Authentication
When not using the kubectl proxy, we need to authenticate to the API Server when sending API requests. We can authenticate by providing a Bearer Token when issuing a curl, or by providing a set of keys and certificates.
A Bearer Token is an access token which is generated by the authentication server (the API Server on the control plane node) and given back to the client. Using that token, the client can connect back to the Kubernetes API Server without providing further authentication details, and then, access resources.
Retrieve the token:
$ TOKEN=$(kubectl describe secret -n kube-system $(kubectl get secrets -n kube-system | grep default | cut -f1 -d ‘ ‘) | grep -E ‘^token’ | cut -f2 -d’:’ | tr -d ‘\t’ | tr -d ” “)
Retrieve the API Server endpoint:
$ APISERVER=$(kubectl config view | grep https | cut -f 2- -d “:” | tr -d ” “)
Confirm that the APISERVER stored the same IP as the Kubernetes control plane IP by issuing the following two commands and comparing their outputs:
$ echo $APISERVER
$ kubectl cluster-info
Kubernetes control plane is running at https://192.168.99.100:8443 …
Access the API Server using the curl command, as shown below:
$ curl $APISERVER –header “Authorization: Bearer $TOKEN” –insecure
{
“paths”: [
“/api”,
“/api/v1”,
“/apis”,
“/apis/apps”,
……
……
“/logs”,
“/metrics”,
“/openapi/v2”,
“/version”
]
}
Instead of the access token, we can extract the client certificate, client key, and certificate authority data from the .kube/config file. Once extracted, they can be encoded and then passed with a curl command for authentication. The new curl command would look similar to the example below. Keep in mind, however, that the below example command would only work with the encoded client certificate, key and certificate authority data.
$ curl $APISERVER –cert encoded-cert –key encoded-key –cacert encoded-ca